

Vinyl toy production is the step-by-step process used to create hollow PVC collectibles from character artwork, 3D models, and production molds. In designer toy manufacturing, the workflow usually includes digital sculpting, prototype development, mold making, rotocasting, trimming, painting, and final assembly. This guide explains how vinyl toys are made in practical manufacturing terms, with a focus on process, materials, and the technical stages that shape collectible-quality results.
Hello! My name is Owen, and I’ve been working in the vinyl toy industry for years. I want to share everything you need to know about vinyl toy production from my firsthand experience in a Chinese vinyl toy factory. As an insider at Sukeauto (sukeauto.com) – a leading vinyl toy manufacturer in Shenzhen – I’ve seen how a simple idea transforms into a collectible art toy on a collector’s shelf. In this article, I’ll walk you through the entire process, from design concept to final product, with as much detail as possible. We’ll also explore some technical challenges, the culture around these toys, and future trends. By the end, you’ll understand why these art toys (often called designer toys) are so special and how a vinyl toy factory brings them to life.
What Are Vinyl Toys?
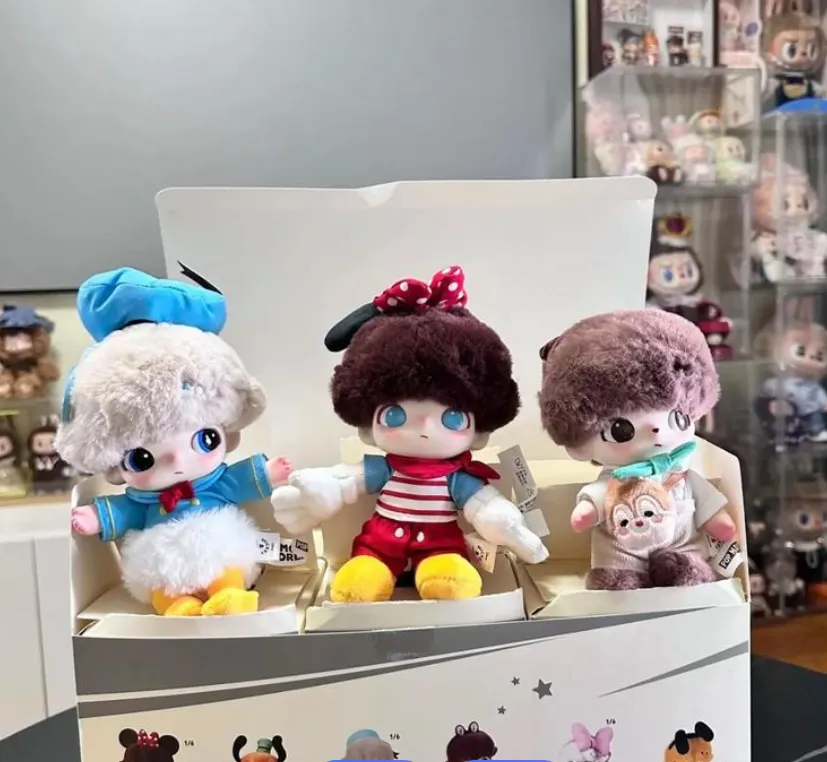
Many people think “vinyl” is a type of material, but it actually refers to a manufacturing process. Vinyl toys are made from PVC (polyvinyl chloride) using a technique called rotational casting (or “rotocasting”/“slush molding”). In simple terms, a liquid PVC mixture (called plastisol) is poured into a hollow mold. The mold is heated and rotated slowly, causing the liquid PVC to coat the inner walls. The heat makes the PVC gel and solidify into a hollow, one-piece figure with a slightly soft, rubbery feel. Unlike hard plastic toys made by high-pressure injection molding, vinyl toys have a unique resilient texture – they are firm but a bit squeezable.
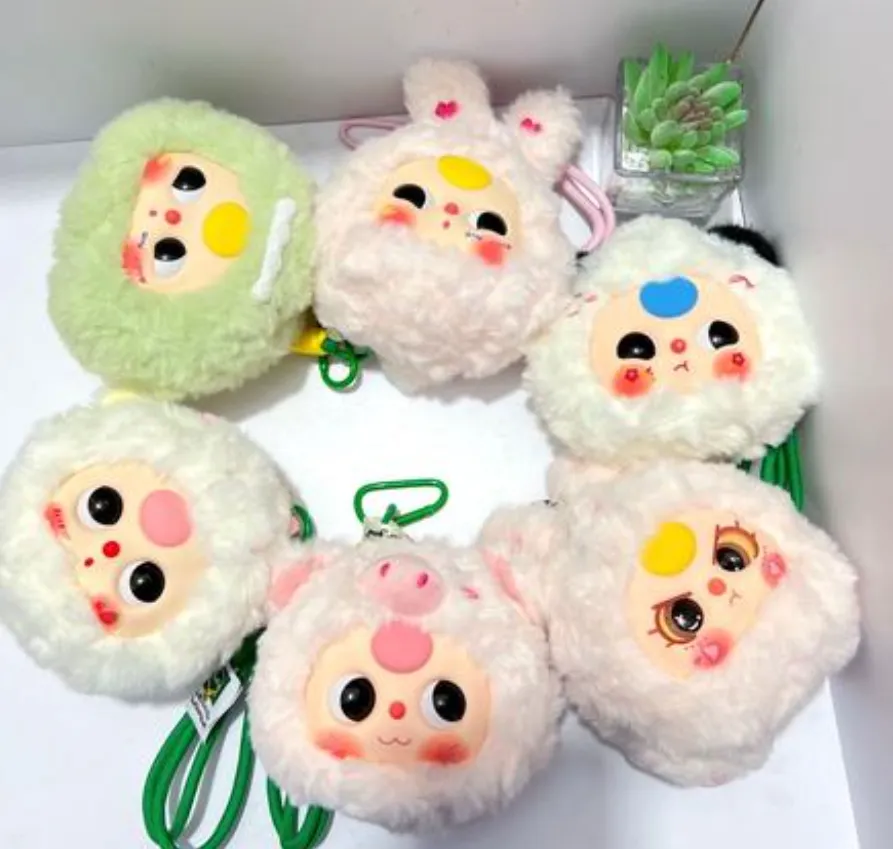
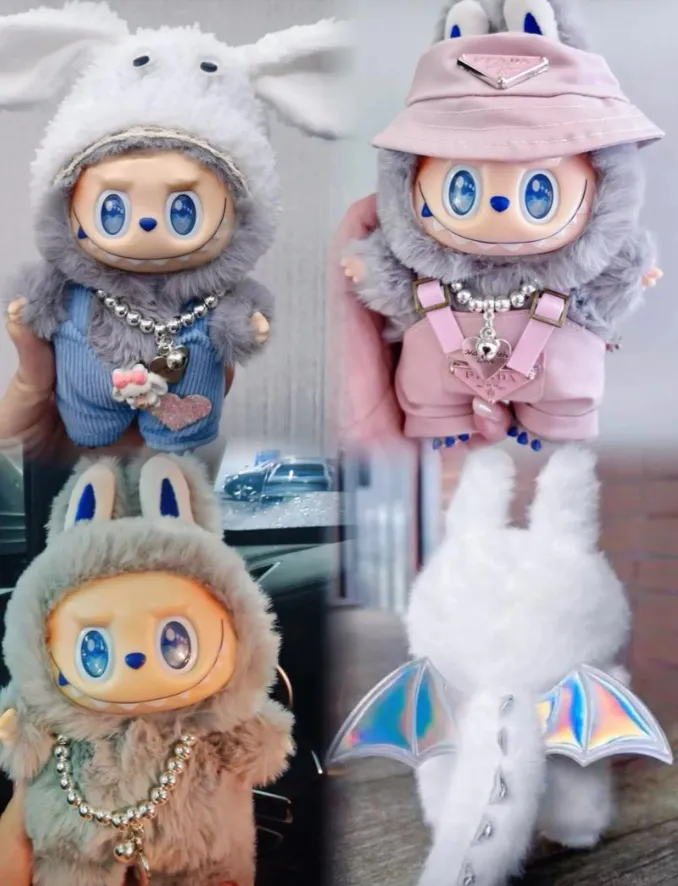
The core appeal of vinyl toys lies in their original artistic designs and limited production runs. These are not mass-market kids’ toys; they are often called “designer vinyl toys” or “art toys” because artists use them as a 3D canvas. Each figure might be produced in small batches (sometimes only a few hundred pieces or less), making them collectibles. They can range from cute characters to edgy urban art figures. The vinyl material and process allow for smooth surfaces, rounded forms, and vibrant colors that really bring the artist’s vision to life. If you’ve ever held a designer toy (like a BE@RBRICK or a Dunny), you’ll notice the soft vinyl difference – it’s lightweight, hollow, and has a bit of give when squeezed, yet it’s durable enough to display or play with.
One thing to clarify: “vinyl” vs “PVC.” Technically, the material of these toys is PVC plastic. The term “vinyl” in “vinyl toy” is a nod to the process (PVC is a type of vinyl polymer). Over time, collectors just say “vinyl toys” to mean those made by rotocasting PVC. Within this category, you might hear “soft vinyl” (in Japanese, sofubi, short for “sofuto biniru”) referring to the slightly soft, pliable PVC used in these toys. There’s also “hard vinyl,” which is a more rigid form of PVC – but most designer art toys are the soft kind, giving them that signature feel.
In summary, vinyl toys are hollow PVC figures made by a special low-pressure casting process, prized for their artistic design and collectible nature. They bridge the gap between toys and art, which is why you’ll find them not just in toy shops, but also in art galleries and design studios.
A Brief History
Vinyl toy production has roots going back about a century. The rotational casting technique was first developed in Germany in the early 20th century, and by the mid-1900s it took off in Japan for making affordable toys. Japanese manufacturers found that by slush-molding PVC, they could produce lightweight, hollow playthings (like dolls, balls, and figurines) cheaply and in large numbers. This method was great for making toys that were big in size but not heavy or overly stiff – perfect for kids.
Fast forward to the late 1990s: vinyl toys took on a whole new life as “designer toys” or “urban vinyl.” This shift is credited to creative pioneers in Hong Kong and Japan. In 1999, Hong Kong artist Michael Lau released a series of limited-edition vinyl figures inspired by street culture and his own illustrations. Around the same time, Japanese company Medicom Toy introduced the iconic BE@RBRICK in 2001 – a simple bear-shaped vinyl figure that became a platform for artists and brands to do wild custom designs. These figures weren’t aimed at kids, but at adults and art collectors. They blurred the line between toy and art object.
The trend quickly spread globally. In the early 2000s, artists like Takashi Murakami and brands like Kidrobot in the USA popularized designer vinyl toys in the West. Kidrobot’s Dunny and Munny figures (blank vinyl rabbits and figures that artists could decorate) became hugely popular in art toy circles. Suddenly vinyl art toys were showcased in boutique shops in Los Angeles, New York, and London, and featured in magazines and art shows. Collectors would line up at conventions to get limited runs and artist-signed pieces.
By the 2010s, the vinyl art toy culture was truly international. We saw collaborations with famous fine artists (like KAWS and his vinyl “Companion” figures selling out in minutes), streetwear brands, and even museums. Vinyl toys became part of pop culture – bridging graffiti art, comic-book styles, and fashion. Throughout all this, the production know-how remained heavily in Asia. Japanese “sofubi” studios continued making small batches by hand, while Chinese vinyl toy factories (especially in the Pearl River Delta region, which includes Shenzhen and Dongguan) scaled up production for global artists and companies. Today, many creators around the world turn to a vinyl figure manufacturer in China to produce their designs, due to the expertise and efficiency here. (For example, at Sukeauto – the art toy factory where I work – we serve artists and brands worldwide, helping them turn concepts into high-quality vinyl collectibles.)
So, from humble beginnings in 20th-century toy shops to the designer art collectibles of today, vinyl toys have come a long way. They carry with them a mix of nostalgia (the old techniques and simple charm) and cutting-edge art/design. Now let’s dive into exactly how these vinyl art toys are made, step by step.
Production Workflow: From Concept to Collectible
Producing a vinyl toy is a multi-stage journey that combines digital technology, traditional craftsmanship, industrial processes, and a lot of hand-finishing. I’ll break it down into four main phases: Design & Prototyping, Mold Making, Rotational Casting, and Post-Processing & Finishing. Each phase is crucial and builds on the previous one. Even after years in this industry, I’m still amazed by the skill and precision that goes into each step. Let’s go through them in detail.
Phase 1: Design & Prototyping
Concept and Design: Every vinyl toy begins as an idea or a 2D drawing. An artist might sketch a character from different angles or create concept art showing colors and details. In many cases nowadays, the design moves into a digital sculpting phase. Using software like ZBrush, Blender, or Maya, the artist (or a 3D modeler) creates a high-resolution 3D digital model of the toy. Digital sculpting is fantastic because it allows for precise control over shapes and details – you can zoom in to add tiny features, symmetry tools to keep things even, and easily make changes or test different poses. For instance, if the toy is meant to have separate parts (like a head that turns or arms that move), the digital model can be designed with those joints or cut lines in mind.
I often work with our clients on this digital phase: we review the 3D model and think about how it will be made physically. Engineering review starts early. We look for undercuts or overhangs in the model – areas that might trap material or make it hard to pull the toy out of a mold. We consider wall thickness too; very thick sections might sink or cool oddly, very thin sections might be weak or not fill properly. If something looks problematic, we adjust the design. Sometimes, to avoid undercuts, we might split a part into two pieces (like making the arms separate pieces instead of attached at a complicated angle). There is a balance between keeping the artist’s vision and making a manufacturable design. In one project I recall, the designer had a figure with arms akimbo and lots of sharp spikes on the head. To produce that, we ended up separating the arms and simplifying the spikes, because the original pose would have caused air bubble traps and required multiple mold pieces. As a vinyl figure manufacturer, we give this kind of feedback to ensure the design can be realized without nasty surprises later.
Master Prototype Creation: Once the 3D design is approved, we need to create a physical master prototype. There are two main ways:
-
3D Printing: The most common method today. We take the digital file and 3D print it at high resolution. Stereolithography (SLA) printers or similar resin 3D printers are often used because they can capture fine detail. The printed master might be in a hard plastic resin. After printing, our model makers carefully sand and polish the master. Even the best 3D printers can leave slight layer lines or texture, so we smooth it out to get a clean surface. If the toy has interchangeable parts or joints, we print those parts separately to ensure everything fits perfectly. We also sometimes slightly oversize the master by a few percent (around 2-3%) to account for shrinkage that will happen later during molding and casting. This is an important detail: PVC vinyl tends to shrink slightly (a few percent) as it cools and solidifies, so if you want the final toy to be exactly 6 inches tall, your master might need to be ~6.2 inches tall.
-
Traditional Sculpting (Clay/Wax): Some artists prefer to hand-sculpt a master using materials like oil-based clay (e.g., Monster Clay) or wax (like prototyping wax). The artist sculpts the figure by hand, which can give an organic, human touch to the form that digital sometimes misses. Once the clay sculpt is done, often a wax copy is made. In traditional sofubi (soft vinyl) making, they pour a wax version of the sculpt (or cast the clay in wax) because wax is easier to refine for mold-making. The wax master can be carved and polished to a super-smooth finish. It’s also easier to electroplate (we’ll get to that) and, importantly, wax can be melted out later. This is a very old-school technique, similar to lost-wax casting used in metal crafts. At our factory, we’ve done this for projects that needed that ultra-smooth finish, or when an artist sculpts in wax from the start. The downside is it takes a lot of time and hands-on skill to do a clay-and-wax prototype compared to digital modeling, but the results can be wonderful.
Prototype Approval and Test Casting: Once we have a master prototype (whether 3D printed or hand-sculpted), we review it with the artist/client. Sometimes we’ll even do a quick resin casting – making a silicone mold and casting a few resin copies – to test proportions, or to have a backup master. This step isn’t always needed, but for complex projects it can help catch issues. We also decide on how the figure will be broken down for production: which parts are separate, where the mold parting lines might go (if any), where the pour hole will be, etc. All these decisions in the prototyping phase set the stage for making the actual production mold.
Phase 2: Mold Making
With a perfected master prototype in hand, the next step is to create the production mold. The mold is what we will actually cast the vinyl in. For vinyl toys, the molds are typically made of metal – specifically, electroformed copper backed by other materials. This is a fascinating process in itself, a blend of art and chemistry.
Electroformed Copper Molds: In the designer vinyl industry, the gold standard is to use copper electroforming to make molds. Here’s how it works:
-
Master Preparation: The master prototype (let’s assume it’s a resin or wax master) is given a super smooth finish. If it’s resin or plastic, we spray it with a thin layer of conductive paint (usually a silver-based paint) because electroforming requires a conductive surface. If it’s a wax master, sometimes they will first make a thin metal “seed” layer by chemically coating it, or more commonly, just plate directly onto it since wax can hold a charge with conductive solution applied. The master might be mounted on rods or a frame so it can be dipped into the plating bath.
-
Electroplating (Electroforming) Bath: The master is submerged in a bath of copper sulfate solution. We hook it up to an electrical current, effectively turning the master into a cathode (negative electrode) in an electroplating setup. Copper ions in the solution are attracted to it and start depositing a layer of copper onto the surface of the master. This is done slowly and carefully over many hours or even a few days. The copper builds up evenly, capturing all the fine surface details of the prototype. Eventually, you get a copper shell that is usually about 3mm to 5mm thick (depending on how strong we need the mold and how big the piece is).
-
Creating the Mold Cavity: Once we have a solid copper shell plated onto the master, we remove the master. For resin masters, we might carefully pry it out (since we used release agents before plating), or cut the shell open along a parting line to retrieve the master. For wax masters, a common technique is to heat the whole assembly just enough to melt the wax inside and let it drain out – leaving a hollow copper cavity in the exact shape of the toy. The result now is a negative mold: a hard hollow metal shell shaped like the figure.
-
Reinforcement and Backing: A thin copper shell alone is fragile and can deform with heat. So we reinforce it. Typically, the copper shell is placed inside a steel frame or jacket. We then pour a backing material behind the shell – often a type of tough epoxy resin or low-melting alloy – to fill the space between the copper shell and the steel frame. When that hardens, it forms a solid block: the copper inner surface provides the precise shape and great thermal conductivity, and the backing gives it strength and durability. Now the mold looks like a hefty block or part, with the interior cavity shaped like the toy part.
-
Multi-Part Molds: Depending on the toy’s shape, we might need multiple mold pieces. A very simple figure (like a round bear shape) can sometimes be done as a one-piece **“cup” mold – basically a single hollow cavity open on one side where you pour in the vinyl. More complex shapes might need a two-part mold (a front and back that fit together) or even additional pieces for limbs, etc. We design the parting line of these molds carefully so that when the pieces come together, they align perfectly and don’t leave a big seam on the toy. The edges of the copper shells get machined so that they interlock or use alignment pins. In our factory, making a two-part mold involves plating both halves of a prototype (or plating one, then repositioning the master and plating the other side) – it’s quite complex and requires experienced technicians.
-
Machining Details: After electroforming and backing, we machine holes and gates into the mold. There’s always a pouring hole (gate) where we will pour the liquid PVC in. And we add vent holes at high points or far ends of the mold cavity – these tiny holes (sometimes literally small drilled holes or thin channels) allow air to escape when the liquid comes in, preventing air pockets. We also drill points for bolts or clamps that will hold multi-part molds together during casting, and possibly attachments so the mold can mount onto the rotocasting machine.
At the end of Phase 2, we have a robust metal mold (or several molds) ready for casting. These molds are like the most prized tool in the whole process – they are custom-made for each toy and can be quite costly (often one of the biggest investments in vinyl toy production). They can be used to cast many hundreds or thousands of toys if treated well. In large productions, we even make multiple molds of the same part so that we can cast several pieces in one machine cycle, increasing output. (For example, if you need to produce 5,000 toys in a tight timeframe, having 2-4 molds running in parallel helps a lot.)
One advantage of these electroformed copper molds is they capture detail beautifully – every little texture on the prototype will show up in the casts. Also, because they are metal, they can withstand the high heat needed to gel the PVC. Compared to traditional steel injection molds, copper molds for vinyl are cheaper and faster to make, but they don’t use high pressure – instead, gravity and rotation do the work. This means no injector pins, no huge press machines – a key reason this method is viable for indie artists and small runs.
Phase 3: Rotational Casting (The Vinyl “Slush” Casting)
This phase is where the magic happens – turning liquid plastisol into a hollow vinyl toy. Even after doing this hundreds of times, I find it really cool to watch. It’s a very hands-on, craft-oriented process, quite unlike the automated world of injection molding.
A. Material Preparation – The “Slush” Mixture:
The material we cast is PVC plastisol, which is basically a thick liquid form of PVC. It’s made by mixing:
-
PVC Resin: a very fine powder of PVC polymer.
-
Plasticizer: a liquid that softens the PVC. Common plasticizers are phthalate-based like DINP (di-isononyl phthalate) or newer phthalate-free ones like DOTP. The amount of plasticizer added (measured in “parts per hundred resin” or phr) determines how soft or hard the final vinyl will be. For soft vinyl toys, we might use anywhere from 50 to 100 phr plasticizer. More plasticizer = softer, bendier vinyl. Less = harder, more rigid vinyl. Typically, designer toys are somewhere in the middle – firm enough to hold shape, but not brittle.
-
Stabilizers: PVC needs heat stabilizers to prevent it from degrading (PVC can discolor or release HCl if overheated). We add a small amount of stabilizer, often a mix of metal salts or organotin compounds, to keep the PVC processing smoothly at high temperature. In toys, we usually use non-toxic stabilizers (like calcium-zinc formulations) to meet safety standards.
-
Pigments/Dyes: If the toy is going to be cast in a certain base color, we mix in pigment paste. These are special color concentrates that blend into the plastisol. For example, if we want the vinyl to come out blue, we add blue pigment paste to the batch. This gives a nice uniform color. Many art toys are cast in a base color close to their final appearance, which reduces how much painting is needed. (Sometimes we cast in white or clear and then paint entirely – it depends on the design.)
We mix all these ingredients in a mixer until it’s a smooth, paint-like consistency – no lumps. The plastisol is like a thick pancake batter. It can be poured, but slowly. It’s important to get the formulation right; we often do small test gels of the plastisol in a lab oven to ensure it cures to the desired hardness and that the color is correct (colors can shift a bit when the PVC gels). We also degas the mixture or let it sit to eliminate trapped air bubbles. Sometimes we’ll prepare several colors if multiple color parts are being cast. For instance, if a toy has a red body and blue head, we might have two plastisol batches ready for each part’s mold.
B. The Casting Cycle:
Now we have molds and plastisol ready. The casting process goes through heating, filling, rotating, curing, and cooling:
-
Pre-heat the Mold: We first heat up the empty mold. This can be done in an oven or heating chamber. In our factory, we load the mold into a rotocasting machine that has a heating oven built in. We pre-heat to a specific temperature, often around 230°C to 280°C (450°F – 535°F) on the mold surface for vinyl toy production. The exact temperature depends on the vinyl formulation and the wall thickness we want. Heating the mold ensures that when the plastisol touches it, it will start gelling immediately and evenly. If a mold were too cool, the first areas the plastisol touches might not gel properly and could cause uneven thickness. We have to be careful: if the mold is too hot at the time of pouring, the plastisol could gel too fast (right at the entry) and not coat evenly. Through experience, we find the sweet spot where the mold is “hot enough but not too hot” when filling. (Sometimes we let the mold cool slightly after pre-heating before pouring in, to avoid instant skinning.)
-
Material Charging (Filling): With the mold hot and ready, we quickly pour a measured amount of the PVC plastisol into the mold cavity. The amount is calculated based on the size of the piece and desired wall thickness. For example, a larger figure might take several hundred milliliters of plastisol, whereas a small figurine might only need 50 ml. We often use a measuring cup or ladle to ensure consistency each time. On complex molds, sometimes we tilt the mold and rotate it by hand a bit while pouring to help the liquid reach all corners initially. Then we seal the mold (put on the other half or cap if it’s a one-part mold) and clamp it tight.
-
Rotating & Gelling: The clamped mold is now rotated on a machine with two perpendicular axes – kind of like a gyroscope or a barbecue rotisserie that spins in two directions. This is the rotational casting machine. It spins the mold slowly (typically around 5–20 rotations per minute). As it rotates, the plastisol inside starts coating the interior walls of the mold. Because the mold is hot, the plastisol touching the metal begins to gel (solidify). Essentially, the PVC particles swell and fuse in the plasticizer when heated. The key is, only the layer touching the mold solidifies at first, forming a “skin.” The continued gentle rotation ensures that fresh liquid plastisol flows over any areas that haven’t skinned yet, building a uniform layer. We usually keep the mold rotating in the oven for several minutes – often something like 5 to 10 minutes, depending on part size and oven temperature.
If the toy needs thicker walls, we either pour in more plastisol at the start or extend the heating time (so more plastisol can gel onto the walls before the inside liquid becomes too viscous). This is a critical control point: wall thickness control is achieved by the amount of material and the heat/time cycle. Our operators often go by both calculation and feel – they know that “for this piece, pour 200ml and cook 8 minutes” for example. Modern rotocasting machines sometimes have precise timing and temperature controls, but a lot still relies on skilled technicians, almost like cooking.
-
Drain Excess (Slush-out): Here’s the trick to making it hollow: once a sufficient “shell” of vinyl has formed against the mold walls, we stop the rotation and quickly pour out the excess liquid plastisol that has NOT gelled. We often do this by opening a drain plug or simply separating a part of the mold (if it opens at a top) and dumping out the liquid back into a container. That leftover liquid can be reused for the next cast, so it’s not wasted. What remains coating the mold is an even layer of half-cured vinyl in the shape of the toy. By removing extra plastisol, we ensure the inside of the toy is hollow.
-
Second Heat (Fusion): After draining, we put the mold back into heat (often continuing to rotate or sometimes just stationary in an oven) for a bit longer to fully fuse the PVC. This makes sure the entire thickness of that vinyl shell reaches full curing temperature (usually PVC plastisol needs to reach around 160–180°C internally to fully fuse into a solid). This secondary heating might be a shorter time, like 2–5 more minutes, since the layer is thin. In some processes (especially in Japanese sofubi workshops), the mold is dunked in a hot oil bath for this curing phase to ensure even heat penetration. Whether in an oven or oil, the idea is to get that vinyl layer fully solid and strong. We look for visual cues – the vinyl should appear uniformly gelled with a slight gloss on the inner surface, and no liquidy areas remaining.
-
Cooling: Once the vinyl shell is fused, we need to cool the mold so the part can be handled and removed. We take the mold out of the heat and often place it in a cooling station. Some factories use a water spray or bath to rapidly cool the mold; others use forced air cooling. At Sukeauto, we use a controlled cooling – a light mist of water or air fans – to bring the mold temperature down without shocking it too fast (to avoid warping metal or cracking the backing). Vinyl actually shrinks a bit (about 1-2%) as it cools, which is helpful because it pulls slightly away from the mold surface. We usually cool until the mold is warm-hot but not burning – often the part inside is then cool enough to solidify but still a tad flexible.
-
Demolding (Part Removal): Now the moment of truth: opening the mold to take out the cast vinyl piece. The mold is unclamped and carefully separated. Ideally, the vinyl casting sticks to one side or the other (or just sits loosely) and we can gently pull it out. The vinyl at this stage is solid but still somewhat soft and pliable (especially if it’s a soft formulation). We often wear cotton gloves and use a small tool or our fingers to ease the part out without scratching it. If the mold was designed with the right draft angles (slight tapering on walls) and vents, the part usually comes out pretty easily. Sometimes a bit of wiggling or using a wooden spatula helps. The piece that comes out is the raw vinyl casting – it has the exact shape of the mold interior, including any fine details.
I have to mention, the first time I pulled a vinyl figure from a mold, I felt such satisfaction. It’s like opening a present – you see the character that was once just an idea now in tangible form, warm and smelling slightly of PVC. We immediately inspect it: checking that all details formed, no big air bubbles, and that the thickness feels right (by tapping or squeezing it). There will usually be excess vinyl around the pour hole or along the edges where mold pieces joined – this is called flash – but that will be cleaned up later. At this stage, if something went wrong (e.g., part of the mold didn’t fill and there’s a hole in the casting, or huge bubbles, or it’s too thin), we adjust our process for the next try (change temperature, time, amount, etc.). But assuming all is well, we let the casting cool completely and then proceed.
This entire casting cycle might take on the order of 10-15 minutes per cycle (plus cooling), though multiple molds can run simultaneously to increase output. Compared to injection molding which can spit out parts in seconds, rotocasting is slow and hands-on. But for the scale of designer toys (hundreds or low thousands of pieces) it’s manageable, and it’s the trade-off for not needing expensive steel molds or huge machines.
Also worth noting: some variations in technique exist. Japanese sofubi makers commonly use an oil bath (called “tokei” or “torque” bath) to heat the molds and often employ a vacuum chamber to assist in pulling air out of the mold during the first rotation (helps reduce bubbles). In our factory, we use modern rotocasting machines with heating elements – it’s a bit more automated, but we can achieve similar results. The fundamentals are the same: coat, gel, dump, fuse, cool, release.
Phase 4: Post-Processing & Finishing
After casting, the vinyl figure finally exists in solid form – but it’s far from finished. This phase is all about transforming the raw casts into beautiful, display-worthy collectibles. It is labor-intensive and largely done by hand. Here’s what happens:
A. Trimming and Deflashing: Every cast part will have some extra vinyl on it that needs removal. This could be a thin flange of material along where mold pieces met (the seam line) or extra vinyl at the pour hole (usually a blob or stub where we poured in the plastisol). Skilled workers use tools like small scalpels, hobby knives, scissors, and files to carefully trim this excess away. For example, if a one-piece mold had an opening at the bottom, there will be a vinyl “cap” where the hole was – we cut that off following the curve of the piece. If it’s a multi-part mold, there might be a thin flash all around the side where the halves joined – we gently slice that off and sand it smooth. This is delicate work because you don’t want to gouge the figure’s surface. A steady hand is required, especially on soft vinyl which cuts easily. Often our team will trim while the parts are still a bit warm (warm vinyl cuts cleaner). We also punch or drill any necessary holes (for example, holes to attach limbs if needed, or air vent marks that need smoothing).
B. Surface Preparation: Before painting, the vinyl parts need to be clean. During molding, we often use a mold release spray (like a silicone or wax-based release) to help parts come out easier – that can leave a residue. Also, sanding or trimming can leave dust. So we give the parts a bath, literally. Typically we wash the vinyl pieces in plain or soapy water and scrub gently, then rinse and let them dry. Some factories wipe each piece with isopropyl alcohol to ensure no oils are on the surface. A clean surface is crucial for paint to adhere well. Sometimes, especially if a part is very smooth, we might even spray a light primer coat to help paint stick – but usually for vinyl, a good cleaning suffices since the vinyl surface has a slight “tooth” for paint.
C. Painting & Decoration: This is where the toy really comes to life with color and detail. Depending on the design, we use a combination of techniques:
-
Hand Painting & Airbrushing: For high-end art toys or complex color gradients, nothing beats hand painting. Our painters use airbrushes to spray smooth gradients or base colors over the vinyl parts. They also use fine brushes for details like eyes, tattoos, or patterns. This method is time-consuming, but each piece ends up like a small artwork. For example, an artist series toy might have each one individually hand-painted with slightly unique touches. We often do multiple layers: base coat, then detail colors, then perhaps a clear coat. Each layer may need to dry (sometimes we use UV-curable paints or heat-set paints to speed up curing). Airbrushing is great for shading and soft color transitions – like giving a figure rosy cheeks or a patina effect. Hand brushing is used for precise details that can’t be masked or printed easily.
-
Pad Printing (Tampon Printing): When we need consistent, sharp graphics on a vinyl toy, we use pad printing. This is a technique where we have a silicone pad that picks up ink from an etched plate (with the pattern) and stamps it onto the 3D surface of the toy. It’s commonly used for things like eyes, logos, or any design that has clear lines. For instance, if a vinyl figure has small stars in its eyes and a logo on its belly, we’ll likely pad print those to ensure each piece has the exact same placement and crispness. Pad printing on a curved vinyl surface works well because the soft pad conforms as it stamps. We often have to create a fixture to hold the toy steady and hit the right spot. If multi-color graphics are needed, we do multiple pad prints with different plates, one color at a time, making sure to align them perfectly (registration). This requires some planning in the design phase – we often ask artists to provide vector artwork for any graphics that need printing.
-
Masking & Spraying: For certain designs, we use masking techniques. Vinyl masking films or stencil tape can be cut to shape and applied to the part to cover areas that shouldn’t get a certain color. Then we spray paint over the piece, let it dry, and peel off the mask, leaving a clean, sharp-edged color block. This is good for large color areas or patterns. For example, if a figure has a big red stripe across its face but the rest is white, we might cast it in white, mask a stripe area, spray red, then remove mask to reveal a sharp stripe. We also use masking for multi-step airbrushing to keep different sections clean.
-
Special Effects: Some vinyl art toys have cool effects that require extra steps. Flocking is one – that’s when you give the toy a fuzzy, fur-like surface by gluing tiny fibers (flock) on it. We’ll spray a layer of adhesive and use a flocking machine that electrostatically deposits fibers onto the piece, making it look like velvet. Another effect is metallization – to make a vinyl toy shiny metallic, we often will either spray a metallic paint or use a vacuum metallizing process (coating the piece in a thin metal film in a vacuum chamber) then topcoat it. There are also glow-in-the-dark vinyls and paints (phosphorescent pigments) which we either mix into the vinyl when casting or apply as a paint layer. And of course, some toys are meant to be translucent or clear – for those we carefully use clear PVC and then do minimal painting so as not to obscure the transparency.
Each painted part typically gets a protective clear coat at the end (usually a matte or glossy lacquer) to seal the paint and give a uniform finish. We use flexible paints and coatings that won’t crack if the vinyl flexes slightly. This is important: standard rigid plastic paints can flake off on bendy vinyl, so we use special vinyl-compatible formulas.
Painting is often the bottleneck in production because it requires skilled artists and time. In our vinyl toy factory, we have a whole painting department where workers line up the parts on racks, each person doing a particular color or step in an assembly-line fashion for efficiency on larger runs. But for small artisanal runs, one painter might complete each figure from start to finish. It really depends on the project.
D. Assembly:
After each piece of the toy is painted and dried, we assemble the toy. Some vinyl toys are single-piece (no assembly needed), but many have multiple parts (e.g., head, body, arms, legs, accessories). Assembly methods include:
-
Press-Fit or Friction Fit: Because vinyl is a bit flexible, often parts can just be pushed together. For example, a head with a neck plug can be popped into the body’s neck hole, forming a swivel joint without any additional hardware. When the vinyl cools and hardens slightly, it can grip well. We sometimes heat one part (like soften the vinyl head) so it can stretch over a joint and then cool in place. Many sofubi toys have simple friction-fit joints (they rotate but don’t easily fall off).
-
Riveting/Joints: For a more secure or mechanical joint, we use rivets. A common case is attaching a vinyl head to a body such that it can turn: we might use a small plastic rivet or grommet. One end of the rivet is inserted from beneath, the other from above, and snapped or ultrasonically welded to cap it, allowing rotation. Some factories use a metal rivet heated to melt the vinyl slightly and form a smooth post. In our process, we sometimes use pre-molded ABS joints inserted into the vinyl (like for movable arms). It depends on design – designer toys typically favor simple swivels over fully posable joints (that’s more in action figures territory).
-
Glue or Ultrasonic Welding: For non-moving parts, or to attach pieces like a small accessory, we might use industrial adhesive. For instance, if a toy comes with a vinyl hat that isn’t meant to come off, a dab of glue will secure it. Ultrasonic welding (using high-frequency vibration to melt plastic surfaces together) can also permanently join vinyl pieces, but it’s tricky with PVC and usually we avoid it unless needed for strength.
-
Spring or Internal Mechanisms: Traditional Japanese sofubi sometimes used little spring joints or even rubber bands internally for figure arms or legs to be posable (sort of like old GI Joe figures with elastic). This is rare in art toys, but some novelty vinyl figures might have a spring to allow a part to wobble or bounce. Also bobble-head vinyl figures have a spring connecting head to body – that we attach by hand during assembly.
Assembly is usually straightforward compared to the previous steps, but we take care to align everything nicely and clean off any excess glue, etc.
E. Quality Control (QC):
Quality checking is critical, especially since collectors buying designer toys can be very discerning. In our factory, we have multiple QC steps:
-
Visual Inspection: Every single piece is checked under good lighting for any flaws. We look for paint issues (like color overspray, missing details, smudges, dust particles in clear coat), casting defects (pinholes, warping, uneven thickness leading to dents), and assembly alignment. The inspectors often have a checklist. Minor paint touch-ups can be done on the spot if something is small; bigger defects mean the piece is rejected or sent back for rework.
-
Functional Checks: If the toy has moving joints or accessories, we test them. Does the head turn smoothly? Do the arms plug in properly? If something is too loose or too tight, we address it (for example, by adjusting the rivet or adding a tiny shim). If the toy is meant to stand on its own, we make sure it balances (no one likes a figure that keeps toppling over on the shelf!).
-
Measurements: For large production, we do statistical sampling to ensure key dimensions are within spec. For example, thickness of certain parts, overall height of the figure, etc., especially if there are tight tolerances (not common in art toys, but still, say the toy must fit in a specific display case slot or something).
-
Safety and Durability Tests: Since many art vinyl toys are more for display, durability isn’t as big an issue as with child toys, but if we produce items intended for kids or mainstream retail, we do additional QC: drop tests (make sure it doesn’t break or hazardous pieces don’t come off if dropped from e.g. 1.5m), paint adhesion tests (tape test to ensure paint doesn’t peel easily), and so on. Also, we ensure there are no sharp edges after trimming. Factories like ours that export globally also ensure all materials and paints used have passed safety standards (EN71, ASTM F963, etc.), meaning no harmful chemicals, and we keep documentation of that.
Typically, our acceptance rate after QC is high if all previous steps were controlled, but any pieces that have noticeable blemishes or errors are pulled out. Some might be fixable (repaint a small area), others are scrapped. The scrap rate for designer vinyl can be a bit higher than other toy manufacturing because of the many hand processes – it’s not unusual to have a few percent of pieces that just don’t make the cut, especially when learning on a new design.
F. Packaging:
The final step is packaging the toys for shipment and sale. Packaging can be very simple or very elaborate:
-
Many designer vinyl toys are packaged in window boxes – cardboard boxes with a clear plastic window so you can see the toy inside. The boxes are often printed with artwork, logos, and information about the toy and artist. We design these boxes in collaboration with the artist or brand. Limited edition toys might even have numbered boxes or special foil stamps.
-
Another common packaging is the blister or clamshell – a clear plastic shell that is molded to the shape of the toy, sealing it in place (often with a backing card with art). This is more often used for smaller figures or when the client wants the item very secure and visible. For instance, if a toy comes with multiple accessories, a blister pack with custom-shaped cavities holds each piece nicely.
-
Bag and Header Card is a classic format particularly in the sofubi scene: the toy is placed in a polyethylene bag and sealed with a stapled cardboard header card (with art/logo). It’s a retro style that harkens back to vintage kaiju toys and is still popular for limited art figures.
-
We also sometimes include certificates of authenticity (especially for hand-painted runs – a little card signed by the artist, numbered X out of Y). If our client is a brand, we might include promotional inserts, stickers, or small catalogs in the package as well.
-
For high-end releases, we’ve done custom cases (like laser-cut foam in a hard case, or wood boxes) – these are more like art presentations. But for most, a well-designed graphic box does the job.
During packaging, we ensure the toy is properly secured (twist-ties or formed trays if needed, so it doesn’t rattle around). We also include any assembly instructions or care instructions if appropriate (for example, some vinyl toys might come with a note “if parts are hard to attach, warm them with a hairdryer for a few seconds to soften”).
Finally, the packages are sealed (taped or stickered), and we place them in master cartons for shipping. We add protective padding as needed to the cartons so all the precious art toys arrive safely to their destination, whether it’s going to an artist’s studio, a gallery, or customers around the world.
At this point, seeing the finished product nicely packaged, ready to delight collectors, is a proud moment for everyone involved. I often find myself browsing social media later, seeing fans unbox the toys we made – it’s incredibly rewarding.
Key Technical Challenges & Solutions
Even with a well-established process, making vinyl toys comes with its share of technical challenges. Over the years, we’ve encountered and solved many such issues. Here are some key challenges and how we address them in production:
| Challenge | Description & Solution |
|---|---|
| Wall Thickness Control | Challenge: Achieving uniform wall thickness can be tough. If vinyl pools in one area, that spot gets too thick; other areas might be too thin and weak. Causes include uneven heating or rotation and part geometry.
Solution: We ensure uniform mold temperature (pre-heat molds thoroughly and even out hot spots by rotating initially or using dampers in ovens). We carefully measure plastisol volume and rotation speed. If a part has a tendency to form a thin spot, we adjust the casting cycle (e.g., rotate slower or change the major/minor axis speed ratio) so material spends more time in that area. Complex shapes might get additional venting or be cast in two halves to ensure even thickness. Through trial runs, we dial in time and temp to get walls typically within ±10% thickness variation, which yields a sturdy figure. |
| Air Bubbles / Incomplete Fills | Challenge: Air can get trapped in the mold, leading to voids or bubbles in the vinyl – especially in narrow tips or corners. Also, if not enough plastisol is used or it gels too fast, some areas won’t fill at all (leaving holes or thin patches).
Solution: We design molds with vent holes at high points to let air escape. These vents are usually tiny (pin-sized) and placed where a small bump or hole won’t be visible or can be trimmed. We also sometimes pull a mild vacuum on the mold after filling to suck out air (some machines have this feature). Rotation patterns are adjusted so that the first few rotations distribute material without trapping air (for instance, we might manually rock the mold before full rotation to “burp” air out). If a persistent air pocket appears during test casts, we’ll drill a new vent there or slightly modify the prototype (e.g., adding a subtle channel for air flow in that area). Proper plastisol quantity and not overheating the mold (to avoid instant skin that traps liquid behind it) also prevent incomplete fills. |
| Paint Adhesion Issues | Challenge: Paint or print can peel, flake, or rub off if it doesn’t bond well to the vinyl or if the vinyl exudes oils. This is often due to surface contaminants (mold release, grease) or using the wrong type of paint on flexible PVC.
Solution: We implement strict surface prep: thorough washing and sometimes a flame or chemical wipe to ensure no residue. We use vinyl-compatible paints and primers – typically acrylic or lacquer-based paints formulated with flexibility. Before full production, we do adhesion tests (like cross-hatch tape tests) on painted samples. If issues arise, we might apply a clear primer base coat (e.g., a vinyl primer spray) on the parts as a foundation. After painting, a protective clear coat is applied to lock everything in. We also advise collectors to avoid harsh conditions (like high heat or chemicals) that could affect paint long-term. |
| Vinyl Plasticizer Migration | Challenge: PVC contains plasticizer that can, over years, leach out to the surface. This can make the toy feel sticky or even cause paint and print to deteriorate (since some plasticizers can dissolve certain paints). It’s especially an issue if low-quality plasticizers are used or if the toy is stored in a hot environment.
Solution: We use high-quality, stable plasticizers (sometimes polymeric plasticizers that are less likely to migrate than cheaper monomeric ones). Additionally, after production, we often “post-cure” the toys by letting them sit and fully cure a bit longer, so excess plasticizer comes out before packaging. A good practice is to lightly wipe down finished vinyl parts to remove any surface residues. Applying a clear sealant or topcoat on painted surfaces also creates a barrier. Modern vinyl toy manufacturers like us are aware of these issues and even explore phthalate-free plasticizers (which tend to have larger molecules that migrate less) to ensure longevity. Collectors are usually advised to keep toys out of direct sun or extreme heat to minimize any sticky fate. |
| Design Limitations (Undercuts) | Challenge: Rotational casting doesn’t use pressure, so extremely fine details or very complex shapes with deep undercuts might not cast reliably. Sharp spikes, long thin appendages, or intricate cavities can result in air pockets or weak spots. Also, the mold, being rigid, can’t have complex undercut shapes or the part won’t come out.
Solution: Design adjustments are often needed. During prototyping, we might simplify overly sharp details (rounding them slightly) or split the figure into multiple parts to handle undercuts (e.g., make a separate mold for an arm that sticks out, rather than casting it attached). We keep shapes somewhat smooth and rounded – you’ll notice many vinyl art toys have bulbous, simple forms; this is partly by design necessity. If a detailed texture is desired, it’s better done as surface texture (which the copper mold captures nicely) than as extreme 3D geometry. For any parts that must be very fine (like antennae, etc.), sometimes we cast those in a different material (like resin) and attach later. Basically, we work closely with the designer so that the art retains its spirit but is adapted to the capabilities of the vinyl process. This avoids frustration later when a too-ambitious shape fails in casting. |
| Manual Process Variability | Challenge: Because so much is done by hand (casting timing, trimming, painting), there can be variations piece to piece. One figure might have slightly thicker walls, another slightly different paint stroke. Inconsistency can be a problem, especially if customers expect perfection. There’s also a higher scrap rate due to human error – e.g., a cast might overcook or a paint mask misaligned.
Solution: We mitigate this with training and process controls. Our team leads have years of experience and they establish standard operating procedures for each project (e.g., “heat mold for 7 minutes at X°C, rotate at Y rpm, pour out at this point…” etc.). We run a pilot batch to fine-tune these parameters and then document them. During production, we enforce quality checks at each stage – for instance, casters check each raw cast for obvious flaws before it goes to finishing, painters check previous color layers before adding another. We also use jigs and guides to help with consistency (like physical stencils for airbrushing certain shapes, or laser-cut masks). Still, some variability is part of the charm of vinyl art toys – each is individually made, not machine-stamped. Collectors often understand this, but we aim to minimize any differences that would be seen as defects. |
In addition to the above, another consideration is mold maintenance. The copper molds can degrade if overheated or handled roughly. We treat them carefully: avoiding overheating (which can cause oxidization or warping), cleaning them gently (no harsh scraping that could scratch detail), and storing them with a light coating of oil to prevent corrosion between production runs. For large orders, we might rotate multiple molds to avoid wearing one out too fast. If a mold does get damaged, we may have to repair it (small dents can sometimes be polished out, or holes soldered) or in worst case, make a new mold from the master – one reason we keep the master prototype safe!
Overall, making vinyl toys is a balancing act of art and engineering. Each challenge has a solution, but it requires understanding the materials and process deeply – something I’ve learned through both formal training and plenty of trial and error on the factory floor.
The Ecosystem: Market & Culture
Vinyl toys might start in the factory, but they live in a vibrant ecosystem of artists, collectors, and pop culture. Being a part of this industry, I’ve seen how production and culture influence each other.
Design and Collector Hubs: Geographically, a few key cities are hotbeds of designer toy activity. Tokyo, Japan is legendary for the sofubi scene – neighborhoods like Akihabara or Nakano have shops filled with soft vinyl monsters and characters, and events like Wonder Festival celebrate garage kits and vinyl figures. Hong Kong is another cradle of vinyl art toys; many pioneering artists (Michael Lau, Eric So, etc.) came from HK, and it remains a place with toy galleries and an avid collector base. Los Angeles, USA is arguably the center of designer toy culture in the West – it’s home to events like DesignerCon (one of the world’s biggest art toy conventions) and had famous stores like Kidrobot and Giant Robot that popularized art toys. LA’s street art, skate, and pop culture vibe blends naturally with vinyl collectibles. We also see scenes in New York, London, and increasingly places like Bangkok and Manila where local designers are emerging.
In recent years, China’s mainland scene has also exploded, especially with the popularity of blind box collectibles by companies like Pop Mart. Cities like Shanghai, Beijing, and Shenzhen have growing designer toy communities and exhibitions. For instance, Shanghai Toy Show and Beijing Toy Show are big annual fairs drawing international attention. As a Chinese manufacturer, we at Sukeauto have had the pleasure of collaborating with not just foreign artists but a new generation of Chinese designer toy creators who are making waves globally.
Manufacturing Hub: On the production side, the Pearl River Delta region in China (including Shenzhen, Dongguan, and Guangzhou) is the heart of vinyl toy manufacturing. The region’s history in plastics and toys, abundance of skilled labor, and established supply chain (for things like PVC material, molds, paints, packaging) make it ideal. Many factories here (big and small) specialize in vinyl and resin collectibles. For example, you’ll find family-run workshops that have been hand-casting vinyl for decades, as well as larger high-tech factories (like ours) that merge traditional craftsmanship with modern project management and quality control. In our own facility, we’ve integrated some automation (like robotic paint spraying for base coats, IoT monitoring of oven temperatures) to enhance consistency, but we still rely on the artistry of human hands for the fine details.
It’s interesting to note that even companies based in the US or Europe typically produce their vinyl toys in China or Japan to tap into this expertise. It’s a common path: an artist from, say, Los Angeles will partner with a vinyl toy factory in China to produce their figures, then the finished goods are shipped back for distribution. We’ve worked with clients from all over – from independent artists doing their first 200-piece run to well-known designer toy brands requiring 5,000 units of a figure for a big release.
Distribution and Sales: Vinyl art toys are sold in a variety of ways. A lot of them are limited editions sold directly by artists or toy brands through online drops – a batch is announced, often teased on social media, and then put up for sale on a website like Sukeauto’s store or the artist’s own site. They often sell out quickly if it’s a popular artist. There are also specialty retailers and galleries that carry designer toys. These include stores like Rotofugi in Chicago, myplasticheart in NYC, Q Pop in LA, and many others worldwide. They curate art toy collections and often host artist signing events.
Conventions and shows are key too. At DesignerCon (DCon) in Anaheim, hundreds of artists and manufacturers have booths – it’s like a giant art toy marketplace and community gathering. Collectors go to meet creators, buy exclusive color variants, and show off their collections. Similarly, in Asia, events like Wonder Festival (Japan) or Beijing/Shanghai Toy Show and Thailand Toy Expo bring communities together. One cool aspect of these events is the crossover with other industries: you’ll see streetwear brands doing toy collabs, comics and game characters reimagined as vinyl figures, etc.
The collector culture around vinyl toys is passionate. People trade figures, unbox them on YouTube, discuss on forums and Discord groups, and even “customize” them (painting their own designs on blank vinyl figures). There’s a thriving second-hand market too, especially for older releases or famous pieces – some limited vinyl art toys have appreciated significantly in value. For example, certain KAWS or Bearbrick figures that originally sold for $100 might fetch thousands now at auctions.
Cultural Value: Why do people love these toys? I think it’s because vinyl art toys sit at the intersection of high art and accessible pop culture. They make art tangible and affordable. Not everyone can buy a painting from their favorite artist, but maybe they can buy a $50 vinyl figure that artist designed. They also have a nostalgia and fun factor (reminding us of childhood toys) combined with subcultural cool (influences from graffiti, comics, music). Some toys carry social commentary or humor, others are just aesthetically pleasing objects. In China, I’ve seen vinyl art toys becoming status symbols for some young collectors, similar to sneaker culture – displaying a rare art toy on your shelf or desk is a statement of your taste and connections.
For the artists, vinyl toys are a way to extend their creative expression. Many illustrators, graphic designers, and even graffiti artists have delved into vinyl figures as a new medium. It’s very satisfying to convert a 2D character into a 3D object people can hold. Plus, collaborations are rampant – one toy platform can have dozens of artists lend their style to it, creating an ever-evolving canvas (like all the different artists’ takes on the Bearbrick or Dunny over the years).
From the perspective of a manufacturer like Sukeauto, we truly enjoy being part of this culture. We aren’t just making widgets; we’re helping art come to life. I’ve had moments where I see a toy we produced featured in a cool magazine or a gallery, or being unboxed by someone across the globe, and it’s a proud feeling. We often invite artists to visit our factory (or now, do video calls) to watch their creations being made – it builds a connection between the creator and the making process, which I find very valuable. It’s not just contract manufacturing; it’s a partnership to create something that fans will cherish.
Fun fact: One of the rewarding projects we did was for a charity art toy exhibition – various artists painted on a vinyl platform figure we made, then the pieces were auctioned for charity. Seeing how each artist’s style transformed the blank vinyl was incredible, and knowing our work contributed to a good cause made all those late nights in production worth it.
In summary, vinyl toys exist in a lively ecosystem. They may be produced in factories, but they travel through conventions, collector shelves, online communities, and even museums. The process of making them is inseparable from the art and people involved at every stage. Understanding this context adds even more meaning to the production process we detailed – we’re not just making products, we’re making cultural artifacts that carry stories and creativity.
Conclusion
Vinyl toy production is truly a fascinating mix of art, chemistry, and manufacturing. I’ve walked you through the whole journey – starting from a concept in an artist’s mind, moving through digital sculpting or hand sculpting, then into the meticulous craft of mold-making, the almost alchemical process of slush casting molten PVC, and finally the loving care of hand-finishing and painting each piece. It’s a process where the viscosity of a plastic “slush,” the thermal dynamics of a copper mold, and the steady hand of a painter all come together to create something special.
Working at a place like Sukeauto, a vinyl figure manufacturer in the heart of China’s toy-making region, I’ve gained immense respect for each specialist involved – the CAD designers tweaking a model at their computer, the technician carefully electroplating a mold for days, the caster timing the heating just right to get that perfect thickness, and the painters turning a blank vinyl form into a vivid character with personality. It’s a team effort that borders on artistry at every step.
These figures we produce are far beyond simple toys. They carry stories – of the artist’s intention, of cultural trends, of the hands that made them. When you hold a designer vinyl toy, you’re holding the result of a hundred decisions and skills. You might notice there’s no obvious parting line on it – a nod to the clever mold-making. You might feel that slight softness when you squeeze it – a reminder of the slush casting technique that differentiates it from injection-molded plastic. You might admire the precise little details painted on its face – evidence of human touch and not just machine printing.
The global phenomenon of vinyl art toys shows no sign of slowing down. If anything, it’s evolving and growing – with new artists, new fans, and new technology. I find that incredibly exciting. From a production standpoint, we stand at a point where tradition meets innovation. We still use methods and even tools that were pioneered decades ago (in some cases, the same type of rotational ovens or even replicated techniques from mid-century Japan), yet we complement them with 3D software and modern quality controls. It’s the best of both worlds.
For anyone reading this who’s perhaps an aspiring toy designer or just an avid collector curious about how these PVC figures are made: I hope this deep dive demystified the process and gave you an appreciation of the craftsmanship involved. Maybe next time you unbox a vinyl figure, you’ll think about the journey it took from a blob of PVC paste to the character in your hand.
And if you ever decide to create your own vinyl toy, there are manufacturers (like us at sukeauto.com) ready to partner with you on that adventure – guiding through design tweaks, creating those copper molds, and spinning that rotocast machine to bring your idea to life. It’s not an easy process, but it’s a rewarding one, resulting in a tangible piece of art that can last for generations.
In the end, vinyl toy production is a labor of love. It’s technical, yes, but also deeply creative. That’s why these collectibles have enduring appeal – they’re born from a synergy of artistic vision and skilled making. I’m proud to be part of it, and I can’t wait to see (and help create) the next wave of amazing vinyl toys that will capture people’s imaginations around the world.
Thank you for reading this comprehensive guide. Whether you’re a collector, creator, or just curious, I hope it gave you a new perspective on those cool art toys sitting on your shelf – and perhaps a desire to add a few more now that you know how they’re made! Keep on collecting and creating.